#Raspberry Pi Thermal Camera
Explore tagged Tumblr posts
Visit Tumblr Blog
Explore Tumblr blogs with no restrictions, modern design and the best experience.
Last Seen Tumblr Blogs


Fun Fact
Tumblr has 4 main sources of revenue.
Text
Transforming Vision Technology with Hellbender
In today's technology-driven world, vision systems are pivotal across numerous industries. Hellbender, a pioneer in innovative technology solutions, is leading the charge in this field. This article delves into the remarkable advancements and applications of vision technology, spotlighting key components such as the Raspberry Pi Camera, Edge Computing Camera, Raspberry Pi Camera Module, Raspberry Pi Thermal Camera, Nvidia Jetson Computer Vision, and Vision Systems for Manufacturing.

Unleashing Potential with the Raspberry Pi Camera
The Raspberry Pi Camera is a powerful tool widely used by hobbyists and professionals alike. Its affordability and user-friendliness have made it a favorite for DIY projects and educational purposes. Yet, its applications extend far beyond these basic uses.
The Raspberry Pi Camera is incredibly adaptable, finding uses in security systems, time-lapse photography, and wildlife monitoring. Its capability to capture high-definition images and videos makes it an essential component for numerous innovative projects.
Revolutionizing Real-Time Data with Edge Computing Camera
As real-time data processing becomes more crucial, the Edge Computing Camera stands out as a game-changer. Unlike traditional cameras that rely on centralized data processing, edge computing cameras process data at the source, significantly reducing latency and bandwidth usage. This is vital for applications needing immediate response times, such as autonomous vehicles and industrial automation.
Hellbender's edge computing cameras offer exceptional performance and reliability. These cameras are equipped to handle complex algorithms and data processing tasks, enabling advanced functionalities like object detection, facial recognition, and anomaly detection. By processing data locally, these cameras enhance the efficiency and effectiveness of vision systems across various industries.
Enhancing Projects with the Raspberry Pi Camera Module
The Raspberry Pi Camera Module enhances the Raspberry Pi ecosystem with its compact and powerful design. This module integrates seamlessly with Raspberry Pi boards, making it easy to add vision capabilities to projects. Whether for prototyping, research, or production, the Raspberry Pi Camera Module provides flexibility and performance.
With different models available, including the standard camera module and the high-quality camera, users can select the best option for their specific needs. The high-quality camera offers improved resolution and low-light performance, making it suitable for professional applications. This versatility makes the Raspberry Pi Camera Module a crucial tool for developers and engineers.
Harnessing Thermal Imaging with the Raspberry Pi Thermal Camera
Thermal imaging is becoming increasingly vital in various sectors, from industrial maintenance to healthcare. The Raspberry Pi Thermal Camera combines the Raspberry Pi platform with thermal imaging capabilities, providing an affordable solution for thermal analysis.
This camera is used for monitoring electrical systems for overheating, detecting heat leaks in buildings, and performing non-invasive medical diagnostics. The ability to visualize temperature differences in real-time offers new opportunities for preventive maintenance and safety measures. Hellbender’s thermal camera solutions ensure accurate and reliable thermal imaging, empowering users to make informed decisions.
Advancing AI with Nvidia Jetson Computer Vision
The Nvidia Jetson platform has revolutionized AI-powered vision systems. The Nvidia Jetson Computer Vision capabilities are transforming industries by enabling sophisticated machine learning and computer vision applications. Hellbender leverages this powerful platform to develop cutting-edge solutions that expand the possibilities of vision technology.
Jetson-powered vision systems are employed in autonomous machines, robotics, and smart cities. These systems can process vast amounts of data in real-time, making them ideal for applications requiring high accuracy and speed. By integrating Nvidia Jetson technology, Hellbender creates vision systems that are both powerful and efficient, driving innovation across multiple sectors.
Optimizing Production with Vision Systems for Manufacturing
In the manufacturing industry, vision systems are essential for ensuring quality and efficiency. Hellbender's Vision Systems for Manufacturing are designed to meet the high demands of modern production environments. These systems use advanced imaging and processing techniques to inspect products, monitor processes, and optimize operations.
One major advantage of vision systems in manufacturing is their ability to detect defects and inconsistencies that may be invisible to the human eye. This capability helps maintain high-quality standards and reduces waste. Additionally, vision systems can automate repetitive tasks, allowing human resources to focus on more complex and strategic activities.
Conclusion
Hellbender’s dedication to advancing vision technology is clear in their diverse range of solutions. From the versatile Raspberry Pi Camera and the innovative Edge Computing Camera to the powerful Nvidia Jetson Computer Vision and robust Vision Systems for Manufacturing, Hellbender continues to lead in technological innovation. By providing reliable, efficient, and cutting-edge solutions, Hellbender is helping industries harness the power of vision technology to achieve greater efficiency, accuracy, and productivity. As technology continues to evolve, the integration of these advanced systems will open up new possibilities and drive further advancements across various fields.
#Vision Systems For Manufacturing#Nvidia Jetson Computer Vision#Raspberry Pi Thermal Camera#Raspberry Pi Camera Module#Edge Computing Camera#Raspberry Pi Camera
0 notes
Text


PCB of the Day! Adafruit AMG8833 IR Thermal Camera Breakout - STEMMA QT 🔥📸🔌
Add heat-vision to your project with an Adafruit AMG8833 Grid-EYE Breakout! This sensor from Panasonic is an 8x8 array of IR thermal sensors. When connected to your microcontroller (or raspberry Pi) it will return an array of 64 individual infrared temperature readings over I2C. It's like those fancy thermal cameras, but compact and simple enough for easy integration.
#adafruit#raspberrypi#electronics#pcb#opensource#opensourcehardware#pcboftheday#thermal#amg8833#grideye#ir#sensor#thermalvision#heatmapping#diyelectronics#techprojects#microcontroller#i2cinterface#stemmaqt#easyintegration#infraredcamera#makercommunity#panasonic#manufacturing#nyc#technology#womanowned
20 notes
·
View notes
Text

Raspberry Pi Projects for Electronics Engineering
Raspberry Pi is a small-sized, versatile single-board computer that has recently transformed electronics engineering by allowing millions of creative solutions. Its flexible form makes it suitable for use in applications such as prototyping, automation, and ofcourse IoT. Electronics enthusiasts can develop different projects such as home automation and robotics, thermal meters and energy saving gadgets. GPIO pins allow you to attach sensors, LEDs, motors and other periphery and make your ideas a reality. For instance, you can construct a simple weather station utilizing temperature and humidity sensitive devices and develop a security system with cameras and turn on motion indicators. Programmability of programming language with raspberry like Python and Scratch makes its usage easier and reduces complexity of the task. From this short introduction, people, who just start with electronics, and people, who design circuits or systems of considerable complexity, will find a lot of potential for both learning and creation with Raspberry Pi. It’s a place that has a great community and multiple resources that make it the perfect platform to learn practical electronics and use them to solve problems.
0 notes
Text
Improving Officer Safety and Surveillance with Low Light USB Cameras
It is more important than ever to protect law enforcement personnel while continuing to conduct efficient surveillance in today's quickly changing society. The low light USB camera is one creative option that sticks out in this endeavor. These advanced devices are revolutionizing how we approach nighttime and low-light surveillance, significantly enhancing both officer safety and operational efficiency. In this blog, we will explore how low light USB camera are making a difference and why they are becoming an essential tool in modern law enforcement.
The Role of Low Light USB Cameras in Law Enforcement
Enhanced Visibility in Low Light Conditions
Law enforcement officers often operate in challenging environments where lighting conditions can be less than ideal. Low light USB cameras are designed specifically to perform optimally in such conditions. Equipped with advanced sensor technology, these cameras can capture clear, detailed footage even in dimly lit environments. This capability is crucial for nighttime patrols, dark alleyways, and indoor surveillance where traditional cameras might struggle.
For example, the low light USB camera's enhanced sensitivity allows it to detect and record crucial details such as facial features, vehicle license plates, and suspicious activities that might otherwise go unnoticed. This heightened visibility ensures that officers have reliable footage to review, enhancing their ability to make informed decisions and respond effectively to incidents.
Integration with Modern Surveillance Systems
Another significant advantage of low light USB cameras is their seamless integration with existing surveillance systems. These cameras can be easily connected to a variety of platforms, including Raspberry Pi and other modular systems, providing a cost-effective solution for upgrading surveillance capabilities. The ability to integrate these cameras with real-time monitoring systems allows for immediate alerts and enhanced situational awareness, which is critical in high-stakes situations.
Moreover, many low light USB cameras offer features such as motion detection and automatic recording, which can be programmed to activate in response to specific triggers. This functionality ensures that officers and surveillance operators capture relevant footage without having to manually start and stop recordings, further improving efficiency and accuracy.
Key Features of Low Light USB Cameras
Superior Low-Light Performance
At the heart of a low light USB camera's effectiveness is its superior low-light performance. These cameras typically feature advanced image sensors and technologies, such as CMOS (Complementary Metal-Oxide-Semiconductor) sensors, which excel in capturing clear images in low-light conditions. Technologies like infrared (IR) illumination and high dynamic range (HDR) further enhance their ability to produce detailed images without compromising clarity or color accuracy.
For instance, the IMX291 USB camera, known for its exceptional low-light capabilities, can capture clear video footage in near-total darkness, making it an ideal choice for nighttime surveillance. By leveraging these technologies, law enforcement agencies can ensure that they have access to high-quality video evidence, regardless of the lighting conditions.
Durability and reliability
In addition to their low-light capabilities, low light USB cameras are built to withstand the rigors of law enforcement operations. These cameras are designed with rugged housings that protect against environmental factors such as dust, moisture, and physical impacts. This durability ensures that the cameras remain operational even in harsh conditions, providing reliable performance when it matters most.
Furthermore, low light USB cameras are often equipped with features such as thermal management systems and shock resistance, which contribute to their longevity and reliability. This robustness is crucial for maintaining continuous surveillance and ensuring that the cameras perform optimally over extended periods.
The Impact on Officer Safety
Improved Situational Awareness
One of the most significant benefits of low light USB cameras is their impact on officer safety. By providing clear and detailed video footage in low-light conditions, these cameras enhance situational awareness, allowing officers to assess and respond to potential threats more effectively. This increased visibility helps officers make better-informed decisions, reducing the risk of accidents and enhancing their ability to avoid potentially dangerous situations.
For example, a low light USB camera mounted on a patrol vehicle can capture real-time footage of a traffic stop or suspicious activity, allowing officers to monitor the situation from a safe distance. This capability enables them to evaluate the circumstances before approaching, ensuring that they are fully prepared for any potential hazards.
Evidence Collection and Accountability
Low light USB cameras also play a crucial role in evidence collection and accountability. The ability to capture clear footage in low-light conditions ensures that all interactions and incidents are documented accurately. This documentation can be invaluable for investigations, legal proceedings, and internal reviews, providing a transparent record of events and actions.
By improving the quality and reliability of video evidence, low light USB cameras help uphold accountability and integrity within law enforcement operations. This transparency not only supports investigations but also reinforces public trust in law enforcement agencies.
In summary
In conclusion, low light USB cameras are revolutionizing the way law enforcement organizations handle surveillance and the security of their officers. Their capacity to deliver crisp, comprehensive footage in difficult lighting situations boosts operational effectiveness, situational awareness, and the general safety and accountability of law enforcement activities. Low light USB cameras will probably be incorporated into more systems as technology develops, which will only serve to reinforce their importance as a necessary instrument for contemporary monitoring and law enforcement.
Investing in low light USB cameras is a strategic move that enhances the effectiveness and security of local law enforcement personnel. It goes beyond simple technological progress. These cameras are laying the groundwork for a safer, more secure future in surveillance and law enforcement thanks to their cutting-edge capabilities and tested performance.
https://www.vadzoimaging.com/product/imx291-low-light-1080p-usb-camera
0 notes
Text
Okay, but imagine if you will a 3 × 3 grid of thermometer sensors hooked up to Raspberry Pi. You could send the serial-data to a visual-output, like "Processing", and generate a really bad thermal-camera
I don't know if there's even an application for this, but an Arduino Mega has 52-digital pins.. I think it could be done?

With fake-news, and unreal imagery, it's best to keep all the "war" stuff clouded in a shroud of physicality. You just have to be careful, because uninformed people can interpret data in illogical ways, and if they're unwilling to do research, you can actually have a mess on your hands.

0 notes
Text
Argon NEO 5 Raspberry Pi 5 Case: Pros and Cons

Argon’s latest case, the Neo 5, is a Raspberry Pi 5 case. The $19 case continues the success of the Argon Neo, one of the best cases for two years, for the latest flagship Raspberry Pi.
Argon Neo 5 has three parts. A plastic base, two aluminum cooling system pieces, and a case lid. Matte black, scarlet plastic, and white text are 1980s-inspired. This is enhanced by a Porsche-style cooling wave.
Can the Argon Neo 5 cool the turbo-boosted Raspberry Pi 5? Or will the engine overheat and sputter?
Argon Neo 5 Technical Specifications
The three-part design has a plastic base and two aluminum pieces. The aluminum body and custom “fins” form a wave from the cooling fan (which looks like a black Active Cooler) to the USB ports.
Overclocking the CPU can heat this cooling wave, surprising USB devices. The aluminum case lid slides in with a satisfying “clunk”. It covers the attractive cooling system but can be secured to the case with optional screws.
Easy assembly. They thermally pad the SoC and PMIC and connect the 30mm PWM fan to the Pi 5’s fan header. It gets tricky here. Fan cables must be routed around a channel on the main body.
This connects to the plastic base, but avoid nipping the cable. It took several attempts and some persuasion to get the cable into the channel and away from the plastic base. They did it, so can you. Take your time and place the cable with a blunt plastic tool. Only four screws secure the base; two more secure the lid to the body.
GPIO, camera/display ports, and the new PCIe connector are accessible from the main body, which has a lovely pinout. However, the Neo 5 repeats the EDATEC mistakes. Tight camera/display and PCIe connector access. To safely lever the plastic lock, we need dexterous fingers or a plastic tool.
Widening cutouts is problematic because the “cooling wave” is nearby. That would need to be cut. The case supports NVMe SSD boards. The Pineberry Pi Hat Drive Top works without the case lid. Outside the case, a Pineberry Pi Hat Drive Bottom or Pimoroni’s upcoming NVMe Base will work.
Returning to the Raspberry Pi pinout listing and GPIO is welcome. It provides Broadcom (BCM) pin mapping, the standard supported by all Raspberry Pi documentation. This will help beginners and old-timers who forget the pinout.
HATs can be directly connected to the GPIO, but we recommend using a male header pin extension to keep them away from the cooling fan. However, few HATs support Raspberry Pi 5. The case’s lid hatch allows GPIO breakout cables to replace header extensions. This makes GPIO breakout to a breadboard or external breakout board via ribbon cable easy.
The optional screw cover covers the micro SD card slot, the last port. This protects the card, but since it doesn’t protrude from the case, we don’t see the point.
They started the Raspberry Pi 5 and let it cool for five minutes for their tests. Then ran a five-minute stress test on all cores after an automated script recorded the idle temperature for one minute.
After a one-minute cool down, they recorded the resting temperature. All data was logged to a CSV file for analysis.
Neo 5 has great thermal performance. The CPU registers 34°C at idle and 54.3°C under stress with the case closed. For comparison, EDATEC-Pi5Case-BS reached 36.2°C and 52.7°C. At stock speeds, the Neo 5 excels. At 50°C, the quiet active cooling fan starts.
The idle temperature strangely rose to 36.7°C with the lid off (even after settling). However, the stress test raised it to 54.3°C, matching the closed case.
The Argon Neo 5’s overclocking performance? Their 4GB test Pi 5 failed to boot at 3 GHz, but they overclocked the CPU to 2.8 GHz, which generated heat. The Pi 5 reached 36.2°C with the lid on and 59.3°C under stress. Several degrees hotter than stock speeds, but well below CPU thermal throttle point. Again strangely below the case closed temperature, the CPU idled at 35.1°C with the lid off. The CPU reached 57.6°C under stress, 2°C cooler than with the lid closed.
Overall, the Argon Neo 5 cools your Raspberry Pi 5. Though not aluminum like the EDATEC case, it works well and simplifies port access.
Wi-Fi Performance Before testing the Argon Neo 5, we tested two EDATEC cases and found that one affected Raspberry Pi 5 Wi-Fi performance. After benchmarking with iperf on a Windows 10 PC connected via Ethernet, they connected three Raspberry Pi 5s via Wi-Fi 5 to a downstairs router.
After the EDATEC results, tested the Neo 5’s Wi-Fi performance and found 79.7 Mbits per second with the case closed. This is much higher than EDATEC’s 51.2 Mbit/s. It reached 75.7 Mbits/s with the case open. Unfortunately, this was 4 Mbits per second slower than with the case closed. We can call this an anomaly given external factors that can affect radio transmissions.
Ethernet is best for maximum bandwidth! However, not everyone has or wants Ethernet cables throughout their home.
The Argon Neo 5 is a basic Raspberry Pi 5 case. It works great, looks good, and exposes the GPIO. Camera/display and PCIe ports are problematic, but they can be fixed.
The wave heatsinks and active cooler cooling system looks good and keeps the Pi 5 cool even when overclocked! This could be one of the best Raspberry Pi cases.
Read more on Govindhtech.com
0 notes
Link
0 notes
Text
Must-Have Most Insane Spy Gadget You Can Buy In Real Life - Part 3 #gadgets #techwidgets #spy
youtube
youtube
Welcome to our channel! In this video, we are going to showcase the 10 Most Insane spray gadgets You Can Buy. If you've ever been fascinated by the world of espionage and secret agents, then this video is for you. Get ready to discover some mind-blowing Insane gadgets that will make you feel like a real-life spy. 👉Subscribe to my channel to stay tuned:
/ @techwidgets720
1. Introducing the Hacky Pi Spy Gadget, a revolutionary device that combines the power of a Raspberry Pi with covert surveillance capabilities. This cutting-edge gadget may appear like an ordinary USB drive, but it holds a secret: it's a powerful hacking tool disguised as innocent storage.
2. PPSS Group Cut-Resistant Clothing, the ultimate protective gear designed to keep you safe in high-risk environments. These innovative garments are specifically engineered to provide unparalleled cut-and-slash resistance, offering a new level of protection for those working in dangerous industries or facing potential threats.
3. The Smart Window Tint Spy Gadget, a cutting-edge device that combines the functionality of window tinting with covert surveillance capabilities
4. The Night Watchman Listening Device, a state-of-the-art gadget that combines the functionality of a stylish wristwatch with advanced covert communication capabilities
5. The Rabbler Spy Gadget, is a cutting-edge device that takes covert surveillance to a whole new level.
6. The TiCAM 90 Thermal Imager, a cutting-edge device that revolutionizes the way you perceive your surroundings
7. The RPlate Digital License Plate, a state-of-the-art innovation that transforms the way we think about license plates
8. Spytec GPS, a cutting-edge tracking device that provides advanced monitoring and location services.
9. The Seek Thermal Compact, is a revolutionary device that brings thermal imaging technology to the palm of your hand.
10. Protect 1206i, a state-of-the-art counter-surveillance device that helps you detect and locate hidden cameras, audio bugs, and other covert recording devices.
These 10 most insane spy gadgets are just a glimpse into the world of covert operations. Whether you're a fan of spy movies or simply want to add some excitement to your life, these gadgets will definitely impress you.
Don't forget to like this video and subscribe to our channel for more exciting content like this. Stay tuned for future videos where we explore even more fascinating gadgets and technologies. Thanks for watching, and remember, the world of espionage is closer than you think!
0:00 Intro
01:05 Hacky Pi Spy Gadget
02:49 Group Cut-Resistant Clothing
04:42 Smart Window Tint
06:05 Night Watchman Listening Device
07:41 Rabbler Spy Gadget
08:50 TiCAM 90 Thermal Imager
10:44 RPlate Digital License Plate
12:17 Spytec GPS
Sure to give this video a thumbs up 👍, and share your thoughts in the comments below! We'd love to hear which technology you're most looking forward to and why. 💬
Don't forget to subscribe to Tech Widgets and hit the notification bell 🔔 to stay updated on the latest tech trends and gadget reviews. We have plenty more fascinating content coming your way, so stay tuned! 📺
Thank you for watching, and we'll see you in the next video! 🎥👋
Check out other videos:
✅ Part-3: Most Insane Spy Gadget You Can Buy
👉
• Must-Have Most Insane Spy Gadget You ...
✅ The Car Even Billionaires Dream of But Can't Afford
👉
• Top 10 Unattainable Luxury Cars Even ...
✅ Most insane spy gadgets you can buy #P2
👉
• Ultimate Spy Gear: Top 10 Insane Spy ...
✅ 11 Coolest Car Gadgets Still Available on Amazon 2023
👉
• 11 Coolest Car Gadgets Still Availabl...
✅ Top 10 Future Concept Cars You Must See
👉
• Top 10 Future Concept Cars You Must See
✅ 20 Emerging Technologies That Will Change Our World
👉
• 20 Emerging Technologies That Will Ch...
All the images, audio, and video clips used in this video are the property of their respective owners and are protected by copyright laws. This video is not intended to infringe any copyright laws, but rather to showcase the content being discussed. If you are the owner of any of the material used in this video and would like us to remove it, please contact us at [email protected]. We will promptly address the issue.
#mostinsanespygadget#insanespygadget#gadgets#techwidgets#spy#spygadgets#youcanbuy#SpyGadgets#CovertTech#EspionageEquipment#SecretAgentGear#IncredibleGadgets#SpyTech#UndercoverTools#StealthyDevices#CovertOps#SpyGear#Youtube
0 notes
Video
youtube
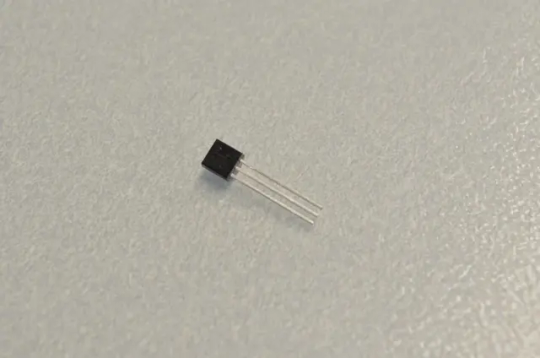
Raspberry Pi Thermal Camera
I finally got around to building a portable thermal camera with the Raspberry Pi. The thermal camera module is an AMG8833 from Adafruit and the Pi is running Python example code also from Adafruit. The entire build is tethered to a picture frame for extreme minimalism and maximum portability. I hope to further refine this project in the future with various improvements but until then let's take in the colorful thermal images of computers and cats.
HacksterIO Project Write-Up: https://www.hackster.io/BlitzCityDIY/raspberry-pi-thermal-camera-b50856
Link to Adafruit Learning Guide for the AMG8833: https://learn.adafruit.com/adafruit-amg8833-8x8-thermal-camera-sensor/overview
33 notes
·
View notes
Photo

Build a thermal camera with Raspberry Pi and Go ☞ https://bit.ly/3l28m91 #pi #raspberrypi
13 notes
·
View notes
Link
3 notes
·
View notes
Photo


Draw This
DIY camera project by Dan Macnish combines ideas of Polaroid instant photography and cartoons, utilizing Machine Learning and Computer Vision to recognize subjects and print out relevent doodles from the Quick Draw dataset:
The camera is a mash up of a neural network for object recognition, the google quickdraw dataset, a thermal printer, and a raspberry pi. Initially, I began with some experiments on my laptop. I set up an image processing pipeline in python to take pre-captured images and recognise the objects in them, using pre-trained models from google. At the same time, I explored the quickdraw dataset, and mapped the categories available in the dataset with the categories recognisable by the image processor. After writing some code to patch the two together, wrapping the lot in a docker image, and cobbling together some electronics, interspersed with some hair pulling moments of frustration, the camera was ready.
Dan’s brief write up about the project can be found here, which includes links to instructions and code to make your own.
#art#tech#camera#photography#machine learning#computer vision#quick draw#dataset#neural networks#raspberry pi#hack#maker
205 notes
·
View notes
Text
Using Raspberry Pi and USB camera modules to monitor and control robots
The incorporation of vision systems is crucial in the quickly developing field of robotics, as it improves the independence and performance of robots. Using a Raspberry Pi and USB camera modules together is one of the most effective and economical methods to accomplish this. This combination makes it possible for both experts and enthusiasts to monitor and manage robots on a flexible platform. In this post, we'll look at using Raspberry Pi and USB camera modules to create a reliable robotic vision system.
USB Camera Modules' Function
Compact, plug-and-play devices and USB camera modules are simple to integrate into a variety of systems. They are extensively employed in robotics, surveillance, and industrial automation. The following are some of the of the main advantages of robotic applications utilizing USB camera modules:
Integration Ease: A Raspberry Pi's USB port makes it simple to connect USB cameras to it. The wiring and setup complexity are decreased by this plug-and-play feature.
High Resolution: High-definition video recording is a feature of several USB camera modules. This is important for activities requiring precise visual information.
Flexibility: A large selection of USB camera is available, so you may select the one that best suits your requirements, be they for high-speed capture at low light levels or particular form factors.
Robotics monitoring and control
When you begin integrating USB camera modules with Raspberry Pi into your robotic systems, that's when the true power of combining them with Pi comes into play. These are a few examples of applications:
Object Tracking and Detection: To put object detection techniques into practice, use OpenCV libraries. This can assist with object recognition and tracking, which is useful for jobs like automated distribution or search and rescue operations.
Using computer vision techniques, identify impediments in the robot's path and steer it around them to achieve obstacle avoidance.
Remote Monitoring: You can monitor and operate the robot in real time by streaming a live video feed from the USB camera to a distant location. Applications involving hazardous environments and monitoring can benefit greatly from this.
Increasing Capabilities with More Sensors
Even though USB cameras offer useful visual information, adding other sensors to your robot's setup can greatly increase its functionality. Think of incorporating the subsequent sensors:
Ultrasonic sensors: for accurate obstacle identification and distance measuring.
Infrared sensors are helpful for identifying thermal signatures and for night vision.
Gyroscope and Accelerometer: To enhance stability, control, and navigation.
In summary
Using Raspberry Pi and USB camera modules together provides a strong and adaptable way to improve robotic vision systems. This combination makes it easier to monitor and manage robots while also delivering high-quality visual data. USB camera modules and the Raspberry Pi can be a game-changer for anyone, be they a professional implementing sophisticated automation systems or a hobbyist building their first robot.
You may build complex robotic systems that are highly efficient at completing a variety of tasks by combining the robust processing capabilities of the Raspberry Pi with the excellent resolution, adaptability, and simplicity of the integration of USB cameras. Now is the time to begin examining the countless options and advancing your robotic endeavors.
for more details visit below website
https://www.vadzoimaging.com/usb3-cameras
0 notes
Text
Lepton camera module

#Lepton camera module full#
#Lepton camera module code#
#Lepton camera module series#
Priority Mail will ship in a larger and more protected package and get to you faster with tracking (recommended option). The project process is documented at hackaday.io.
#Lepton camera module series#
The lepton sensor module is a more fragile device. This repository contains code, libraries and hardware I developed over the course of making a series of thermal imaging cameras based on the FLIR Lepton 3.5 camera or module on many different platforms. Please Choose the proper shipping during checkout, only pick Bubble Envelope for the circuit board without lepton, and if you want to risk damage. I still have some Breakout breakout boards in stock and A new version of the lepton with shutter are back in stock. I want more Info!Ī Google groups page has been created here: /d/forum/flir-lepton This will allow you to buy just a single module (or more). We are working with, A crowd-funding site for buying stuff.
#Lepton camera module full#
Lets you see in full darkness! Where do I get a Lepton Module? This board make connecting the Lepton Module to something like the Raspberry Pi much simpler. This library allows communication with boards running a Lepton FLiR thermal. Created by NachtRaveVL, August 1st, 2016. Licensed under the non-restrictive MIT license. Library to control a Lepton FLiR (forward looking infrared) thermal camera module. In addition the Lepton module requires a special socket to be used that is difficult to solder down (and hard to buy). C Library for the Lepton FLiR Thermal Camera Module. There Currently are no other breakout boards for the Lepton Module. (The shutter can be removed if unneeded or manually controlled via i2c) Overall it produces better quality images. Lepton 3.5 Lepton 3 Lepton 2.5 LWIR Micro Thermal Camera Module.
The shuttered version of the lepton automatically does a flat field correction on power-up and when needed(This calibrates the sensor, reduces noise, and gets rid of the lines reported on some of the sensors). The FLIR Lepton is a radiometric-capable LWIR camera solution that is.
Both modules feature a CCI (I 2 C-like) control port and video. The 3.0 module is non-radiometric, while the 3.5 module has a radiometric thermal imaging system.
The PCB has the same size and mount holes as the standard raspberry camera Teledyne FLIR Lepton 3.0 and 3.5 Micro Thermal Camera Modules offer 160 x 120 active pixels and
To configure the camera settings you also need an i2c port, although this is not required.
To read an image from the lepton module all you need is an SPI port.
This board will accept from 3-5V input and regulate it to what the Lepton Module wants.
This revolutionary camera core is poised to equip a new generation of mobile and handheld devices, as well as small fixed-mount camera systems, with thermal imaging capabilities never seen before.Lepton contains a breakthrough lens fabricated in wafer form, along with a microbolometer focal plane array (FPA) and advanced thermal image processing. It packs a resolution of 80 × 60 pixels into a camera body that is smaller than a dime. The FLIR Lepton™ is the most compact longwave infrared (LWIR) sensor available as an OEM product. This board provides the socket, power supply's, 25Mhz Crystal Oscillator, 100 mill header for use in a breadboard or wiring to any host system such as an ARM based Arduino or a Raspberry Pi. This is a Breakout board for the Lepton Thermal Camera Module. It captures infrared radiation input in its nominal response wavelength band (from 8 to 14 microns) and outputs a uniform thermal image. Also includes a port of FLIR's LeptonSDKEmb32OEM CCI to the Arduino platform.Stock is being refilled, in the meantime you can get the camera and breakout here: What is it? FLIR's Lepton is a complete long-wave infrared (LWIR) camera module designed to interface easily into native mobile-device interfaces and other consumer electronics.
#Lepton camera module code#
My version uses the VSYNC output from the Lepton to synchronize the VoSPI transfer as an experiment to increase the reliability of syncing a user-space process to the Lepton video stream.Ĭontains the code I wrote initially for a test platform based on the PJRC Teensy 3.2 board to learn about the Lepton. This directory contains the code supporting the camera and the re-targeting of my Solar Pi Platter as a power-management and expansion board for the Pocketbeagle.Ĭontains a modified version of Damien Walsh's great leptonic program running on the Raspberry Pi. The pocketbeagle was used for the final design of a thermal imaging camera. ESP32Ĭontains code, design information and supporting applications for a pair of cameras based around the ESP32.Ĭode for the Beaglebone Black including my initial PRU-based VoSPI video pipleline and LCD display. This repository contains code, libraries and hardware I developed over the course of making a series of thermal imaging cameras based on the FLIR Lepton 3.5 camera or module on many different platforms.
0 notes
Text
Lepton camera module

#LEPTON CAMERA MODULE HOW TO#
#LEPTON CAMERA MODULE DRIVERS#
#LEPTON CAMERA MODULE PORTABLE#
#LEPTON CAMERA MODULE SOFTWARE#
#LEPTON CAMERA MODULE PROFESSIONAL#
There’s also a 1/4-20 threaded insert on the bottom of ’s version, making it far more useful in any experimental setup. These thermal images were combined with a VGA resolution camera to produce the very cool enhanced imagery the commercial unit will get you. This thermal camera is built around the FLIR Lepton sensor, providing thermal images with a resolution of 60 by 80 pixels. We first saw it about a year ago, and the results were impressive. has been working on his DIY thermal imager for a while now. That doesn’t mean we’re stuck with crippled thermal imaging cameras, though: we can build our own, with better specs than what the big boys are selling.
#LEPTON CAMERA MODULE HOW TO#
Once FLIR figured out the people who would be most likely to own a thermal imaging camera can figure out how to upload firmware, the party was over. In a manufacturing triumph, the cheapest of these thermal imaging cameras contained the same circuitry as the one that cost six times as much. Who doesn’t like a challenge? Posted in contests, hardware Tagged contest, flir, Flir lepton, thermal imaging cameraĪ few years ago, FLIR unleashed a new line of handheld thermal imagers upon the world. And the challenge of solving a tricky problem and making designs easier for others is a powerful motivator. Peter has a $125 Sparkfun gift card on offer for each of the two winners.
#LEPTON CAMERA MODULE DRIVERS#
The goal here is to create useful Open Source drivers for some very interesting hardware, and there’s some prizes to sweeten the pot. This really is a great example of what the Hackaday.io community is capable of. You can understand how he became interested in portable, and we’re sure whatever project he has in mind for this battery-powered Flir will be awesome. Peter Jansen is the creator of the Open Source Science Tricorder (yes, it’s a tricorder) which took Fourth Prize in the 2014 Hackaday Prize. The Lepton gives any project thermal imaging, and the PureThermal board turns the Lepton into a USB device. For a pair of Benjamins, the specs are very impressive: the Lepton has a resolution of 60×80 pixels and everything is can be read over an SPI port. The Flir Lepton is a tiny little thermal camera that’s been available to the Maker community for some time now, first through GroupGets and now through Sparkfun. There are two challenges here, one for the Raspi and one for the ESP32 and winner will be named for each.
#LEPTON CAMERA MODULE SOFTWARE#
Any software in this challenge must spit out absolute temperature values in a text format, and there must be a demonstration of putting the Flir Lepton into low-power mode. The rules for this challenge are to use the Flir Lepton 2.5 in radiometric mode using either the Raspberry Pi Zero W or ESP32. Yes, this is a documented feature in the Flir Lepton module, but so far very few people are using it, and no one has done it with a small, battery-powered device. There’s a catch, though: this is a project to use the Lepton in radiometric mode, where the camera spits out an actual temperature value for each pixel. Use a Flir Lepton thermal imaging camera module in a battery-powered configuration. Peter Jansen has opened up the Hot Camera Contest on Hackaday.io to use a thermal imaging camera in a battery-powered project. Here’s a challenge for all you hardware hackers out there. Posted in hardware Tagged diy flir camera, Flir lepton, tcam-mini Along with tweaking the ESP32 firmware, there is still a lot that can be done with the TCam-Mini, but it sure looks like a fun project to tinker with if one is into Leptons. For this he repurposed an old in-ear thermometer calibration device. Recently has also begun to further characterize these Lepton sensors, in order to see whether their accuracy can be improved from the rated +/- 5-10 ☌.
#LEPTON CAMERA MODULE PROFESSIONAL#
Being able to load the radiometric data directly into a desktop application for processing makes it a closer match to the professional thermal cameras which states that he’d like to get as close to in terms of features as possible.
#LEPTON CAMERA MODULE PORTABLE#
Compared to the aforementioned FLIR One Pro, there’s a definite benefit in having a more portable unit that is not reliant on a smartphone and accompanying FLIR app. Not cheap, but quite a steal relative to e.g. The project is available on GitHub, as well as as a GroupGets crowd-funding campaign, where $50 gets one a TCam-Mini board, minus the $199 Lepton 3.5 sensor. Using the 160×120 pixel FLIR Lepton 3.5 thermal sensor, and combining it with a custom PCB and ESP32 module for wireless, he created a wireless thermal camera called the TCam-Mini along with accompanying software that can display the radiometric data. While the ultimate goal is to create a stand-alone solution, with its own screen, storage and processing, the TCam-Mini is an interesting platform. With how expensive thermal cameras are, why not build your own? This is the goal with which set out a while ago, covering the project in great detail.
0 notes